
Experimentation
Coming towards the second half of the Google Summer of Code period, an experimentation setup was planned. This was exactly what comes under exploring uncharted territories. We were planning to create a machine learning architecture integrated with an easy to use cloud based interface. It turned out to be much more. With the help of the present toolbox, one can use a predefined set of algorithms (which basically emulate the scikit-learn api for python) and can run their custom script with effect of a single function.
In this blog post, you get a free tour of how the work progressed and how new ideas shaped up what is now the machine learning cloud setup for scilab. All of the updates and code can be veiwed on the github sub-repository.
Work updates
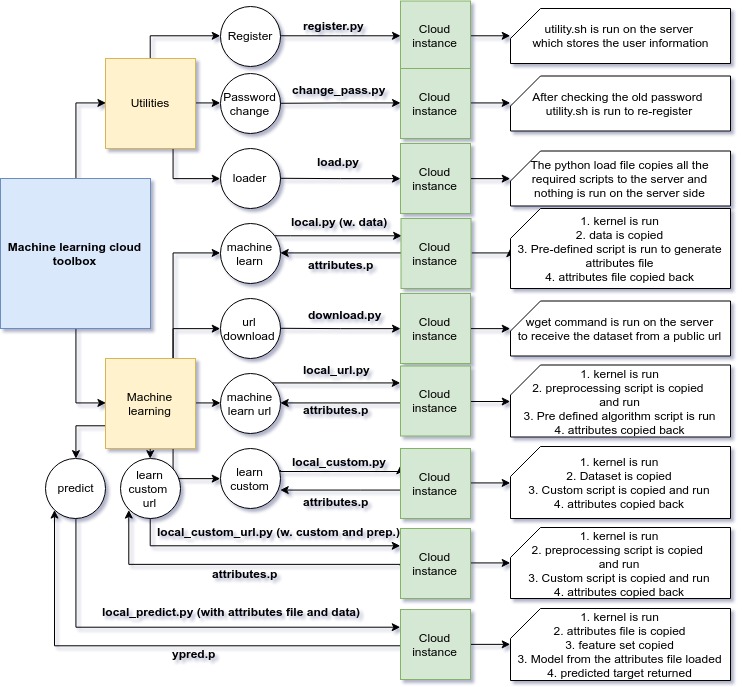
This section gives you an insight into how each feature was added to the setup. Each update is preserved in form of a sub repository on github and thus the progress can be analysed. The progress is explained in 10 steps below. The flow is explained as (from the scripts in Automated) :
- Script
is called from a directory on the local server. This script calls python_local.py. - Script
clears all already running jupyter kernels and starts a new kernel in a nohup fashion, thus appending the output to nohup.out. After the kernel starts, the script copies the dataset and python script to the server to directory /home/username/Shared/ - Then the script runs the
with the parameters of the running kernel obtained from . - The script
then starts a connection to the kernel and runs the training script with the results stored in - Then our process returns back to
which then copies back the pickle file in protocol 2. - Then
reads the pickle file and then uses it as and so required.
A lot of additions/modifications were made from this initial setup. For the experimentation part the progress was made in 10 steps. Each of these steps can be viewed in on the github directory in different (numbered) sub directories. Our toolbox has dependencies over PIMS.
-
The first step was to automate the complete training procedure. This was done by writing a scilab script which copies a python script with a dataset to a server and then runs the script on the server and then copies the attributes back.
-
The second addition was to move the script to the server earlier itself and then only move the preprocessed dataset to the server and the copy the attributes back.
-
The third addition was to add a custom url for dowloading the dataset on the server itself and then copying a preprocessing script. This led to reduced time taken for the complete process. Thus we now had two different flows to proceed.
-
The fourth step was to add authentication for a user. (This would later be updated so that a user’s details are stored and then not asked for repeatedly)
-
The fifth step included an addition of custom python files that can be pushed by the user as well. This was integrated with both our original functionality and the url based method. This added the third and the fourth flow to our setup.
-
The next step was to add a mechanism to remove the repeated input for user end arguments. This was done by adding a data section to the toolbox.
-
Addition of parameters to the scikit learn function was then enabled (in a string form) which helped us emulate the complete scikit learn repository
-
Automated testing mechanism was added for each of the flows as well as utilities such as password change nd user register, with a demo file to run them all at once.
-
Advanced tests were written so that all the predefined algorithms are also tested with each flow. Also added a prediction section using the pickle files.
-
A loader script was written which transfers the required server files to a new user on the cloud.
Architecture
Preparation
There are some dependencies required for this toolbox.
PIMS/scipython
If you are using scilab < 6.0.0 then you can use PIMS as your python wrapper. To install PIMS run atomsGui() in your scilab console and navigate to Scilab development category.
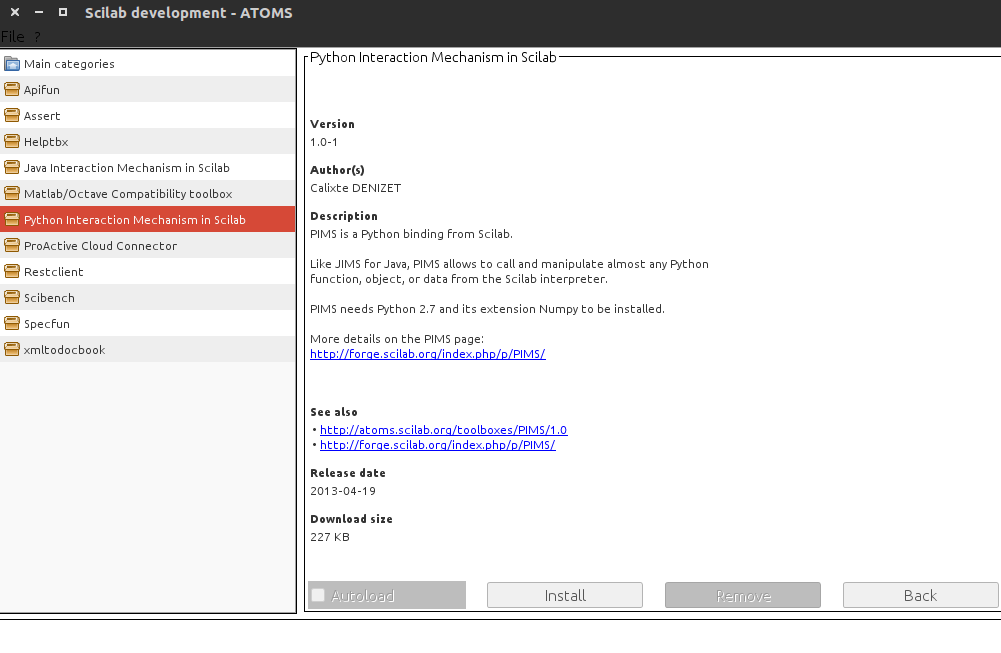
Just click on install and check the autoload checkbox and you won’t have to worry about it. For scilab >= 6.0.0 users, similarly install scipython.
Python 3
You can go through the required package here and then proceed with the installation instructions as stated there.
Other preprocesses
In order to start up with the toolbox you would need to follow the following steps as well :
- Install anaconda on the server (or alternatively numpy, pandas and scikit-learn)
- Add the public key to the metadata of the server
- Run the loader function (as stated above)
- Run the register function
Usage
This section explains the usage of the setup and how one can check whether it is working fine or not. There are around 6 different flows that one can make use of.
Register and password change
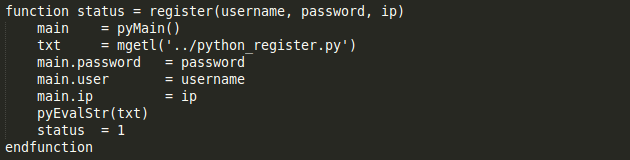
To register a user (whose public key is stored on the cloud metadata) one can run the register command which has the following structure
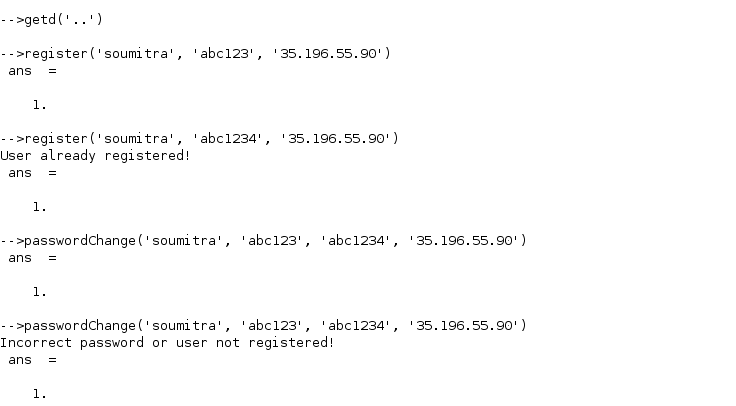
If a user is already registered, it throws an error. To change the password of an existing user one can run the passwordChange command. Again, the user must have his metadata on the server and also be registered to execute this. The structure of this command is as follows

We can observe the usage and errors raised in the screenshot :
Machine learning basic
The machine learn command is the most basic command and requires the user to write down the model to use, the data matrix. It prompts for a username, password and ip if it is not registered already. The usage can be seen below
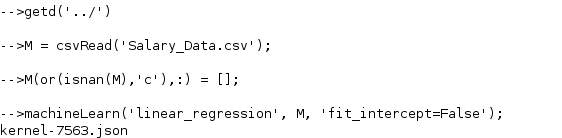

So the dataMat is copied to the server and the attributes are copied back.
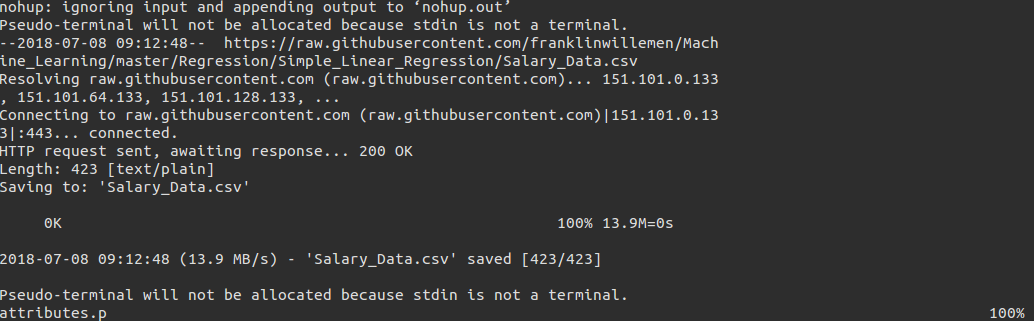
Added url functionality
This command enables you to download the dataset directly onto the server. You need to write down a preprocessing script in this case which outputs the dataset into the required format (see demo). We first need to download the dataset using machineLearnURLDownload(url) and then use that dataset any number of times using machineLearnURL(modelName, preprocessing)
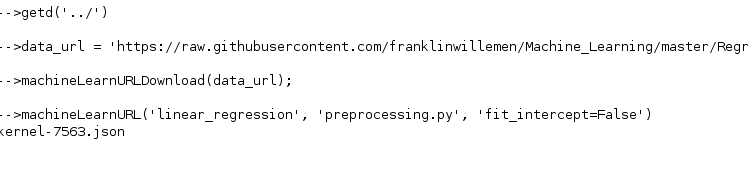
We can see that the dataset is downloaded on to the server and then the training file is copied back.
Custom scripting
This command is to be used when you want to run a custom script on the server. The inputs to this are the script and data. The script is the python script stored with the name (without the extension). More can be understood from the usage screenshots.
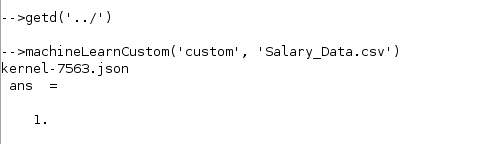
We can observe that the dataset and the custom file are copied (now here instead of a preprocessed dataset, the complete is copied since the user is already writing a script of his own) and then the attributes file is copied back.

Similar to the URL setup we had for our basic mode, we have it in the custom flavour (with the same download pattern).
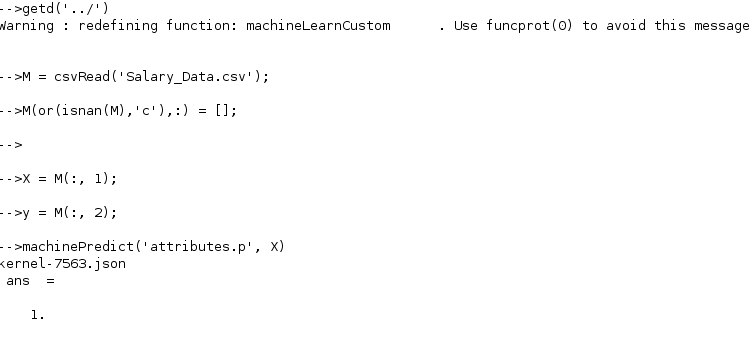
Prediction mechanism
Once you have one of your pickle files ready from the training mechanism from one of the flows as stated above, you can write down a prediction setup, which gives you the pickle for the predicted target variable. More can be understood from the screenshots.

The toolbox
The complete setup is structured and compiled into a atoms toolbox which can be viewed in the sub-repository
The standalone toolbox
A stand alone toolbox for machine learning in Scilab (with all native code written in Scilab) was also prepared and can be viewed in the sub-repository
For atoms, it can be downloaded from the scilab page
Required Packages:
- PIMS
- Scilab >= 5.2
- Python 3